All shared physical LUNs need to be initialized as physical volumes by CLVM before volume groups and volumes can be created. The administration tool system-config-lvm can be executed from any node in the cluster that has successfully installed, configured and started clvmd.
In this example, the remote hostname where the X windows will appear is called adminws. For X11, xhost + must be executed on adminws from any session running on this system. A shell window on adminws will login to lock1 and must have the DISPLAY environment variable set either upon login or in some profile.
-
Run:
lock1 $ export DISPLAY=adminws:0.0
-
Run xclock, to make sure that the X11 clock program appears on the adminws desktop.
Tip
Running X through a firewall often requires you to set the flag on the ssh command and possibly fiddle with the .ssh/config file so that X11Forward yes is included. Remember to disable this feature once you are preparing to run the 10gCRS installer as it will need to execute ssh commands between nodes (such as ssh date) that only return the date string (in this case) and nothing else.
The GUI tool starts and the initial screen appears.
-
Run:
rac1 $ sudo system-config-lvm
-
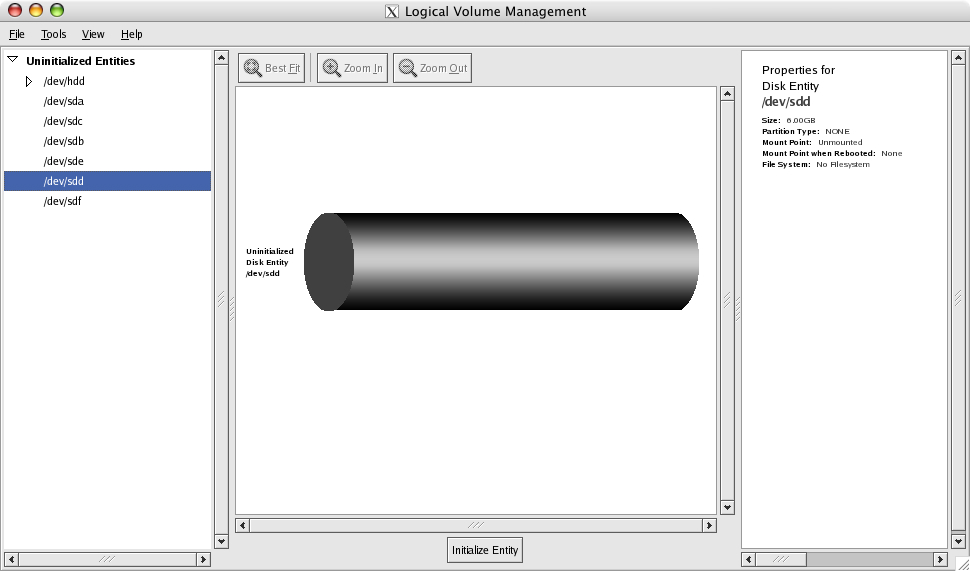
Identify and highlight the 6GB raw LUN that will be listed under the Uninitialized Entries and then click Initialize Entry. The Properties pane can be used to verify the size and other characteristics.
-
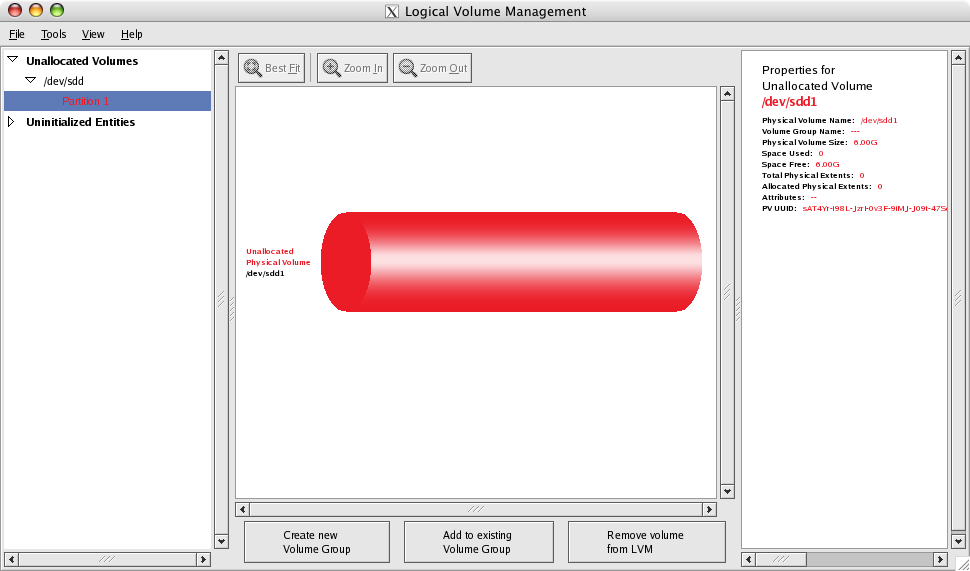
Create a new volume group on this physical volume group by selecting Partition 1 and then clicking Create new Volume Group. Although volume groups may consist of multiple physical LUNs, these LUNs were created on a storage array that implements both the stripping and mirroring. The physical extent size of 128k is a reasonable average extent size for most Oracle databases.
Note
Oracle has its own extent strategy and the policies used on tablespaces factor more directly on performance than the LVM extent size. A good general practice for tablespaces (using the create tablespace command)that hold tables is a 1M extent and the indexes will match the LVM extent size of 128K.
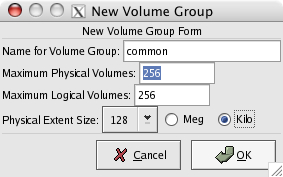
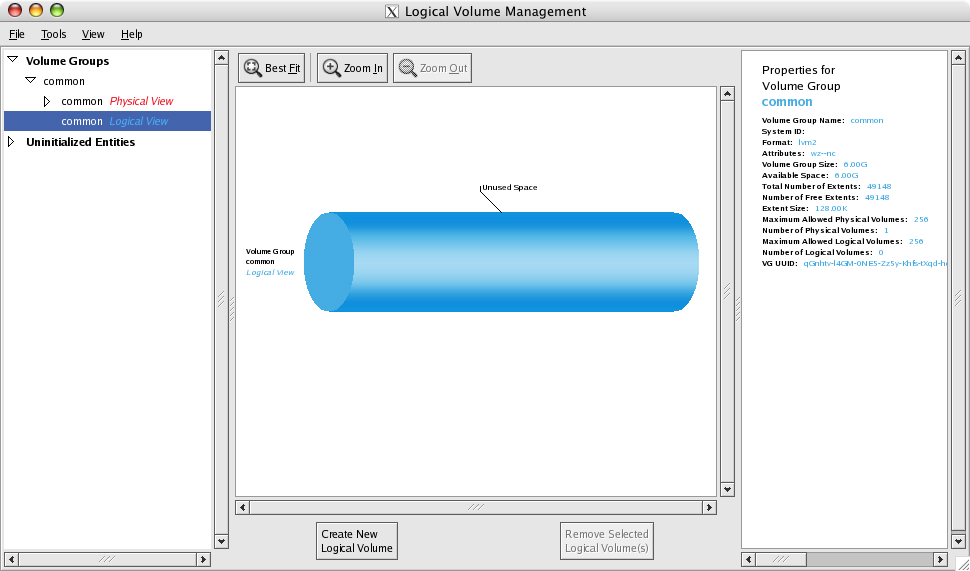
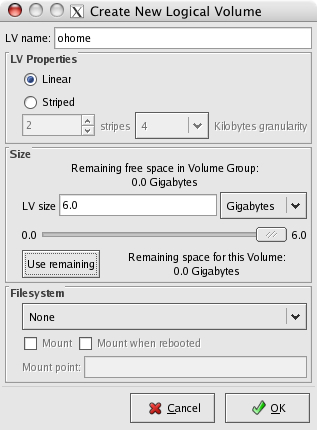
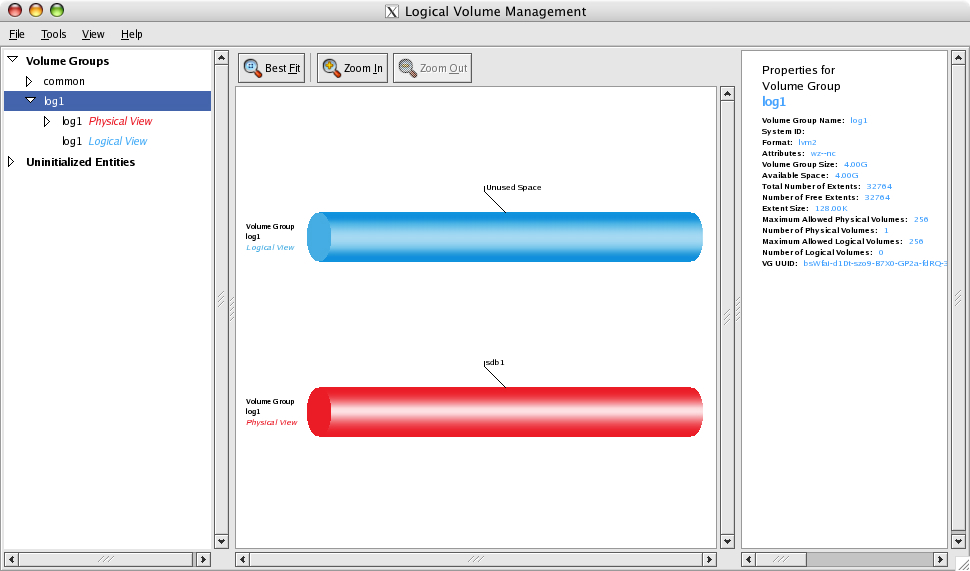
The volume group common is a 6GB volume that will contain the Oracle shared home installation of both Clusterware and the RDBMS.
-
Highlight the Logical View for the volume group common and then click on Create New Logical Volume
-
There are two ways to consume free space: click the Use remaining button or slide the allocation bar all the way to the right.
Warning
Do NOT define any filesystems during logical volume creation. The GUI assumes that the number of nodes that are in connected to the cluster is the number of lock journals that will be required. This cluster is being incrementally installed, so this value will be wrong. GFS volumes will be created using the mkfs.gfs command.
-
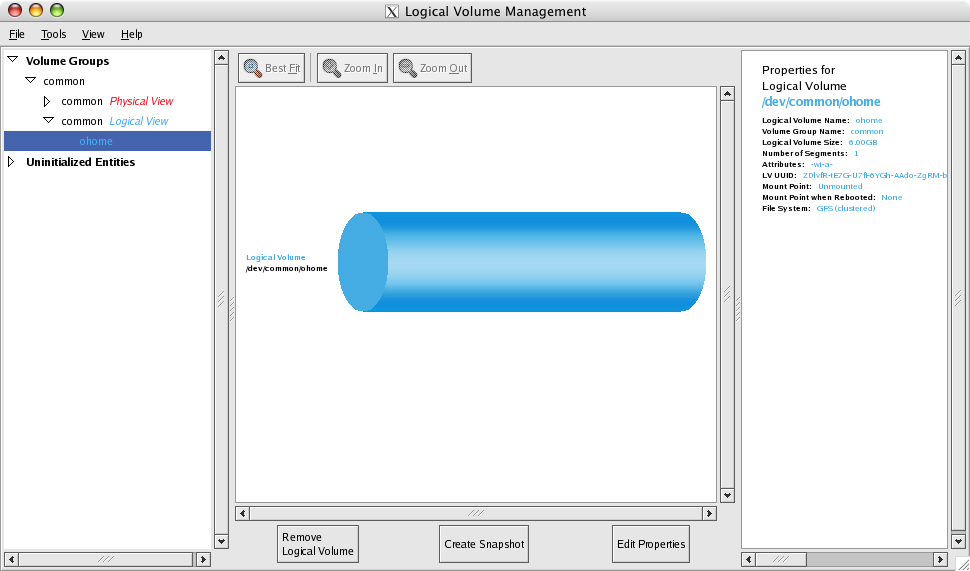
Click OK and the main screen should look like this:
...and the newly created logical volume will have a block device file names that will be used by the mkfs.gfs call and in /etc/fstab.
-
Run:
lock1 # ls –l /dev/common/
1 root root 24 May 3 18:11 ohome -> /dev/mapper/common-ohome
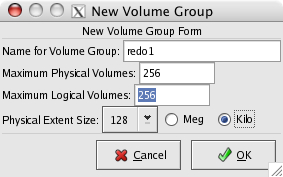
There are four 4GB physical LUNs that need to be initialized as physical groups, volume groups and then logical volumes. Each one corresponds to the redo/undo GFS volume for each RAC node. The steps used to create this logical volume will only show the first redo log, and the steps will be need to be repeated for the remaining three 4GB physical volumes.
-
Initialize the physical LUN /dev/sdb. The physical LUN /dev/sda is reserved for the Oracle Clusterware files and must not be initialized by CLVM.
-
Create the volume group redo1. Click on Create New Volume Group. Verify that the extent size is 128 KB.
-
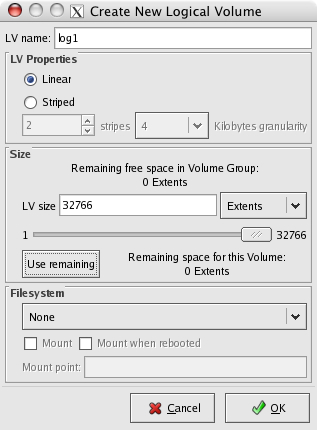
Create the logical volume log1 by clicking on Logical View of redo1 and then clicking Create New Logical Volume.
Use the entire volume when creating the log1. The default units are Extents; you can use this or set it to Gigabytes. Since this logical volume will be the entire contents of the volume group, leaving the units as Extents and then clicking on Use remaining will be the easiest.
-
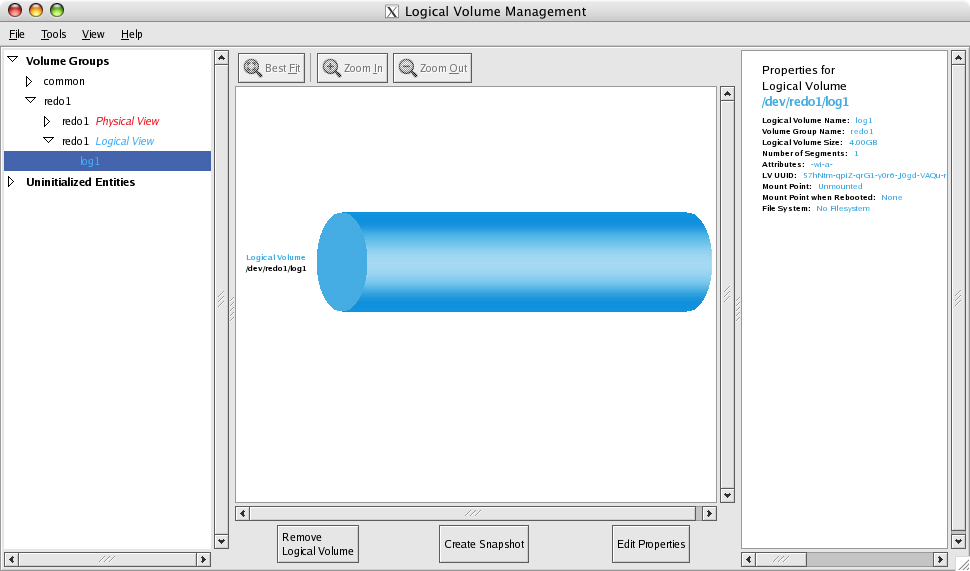
Verify in the Properties pane, that the pathname to this file is /dev/redo1/log1 and that the all 4GB was used to create this logical volume. Click OK.

Repeat the process in the previous section for the remaining 4GB physical LUNs. Once complete, the main window should show all redo logical volumes and the common volume that will be used for the Oracle shared home.
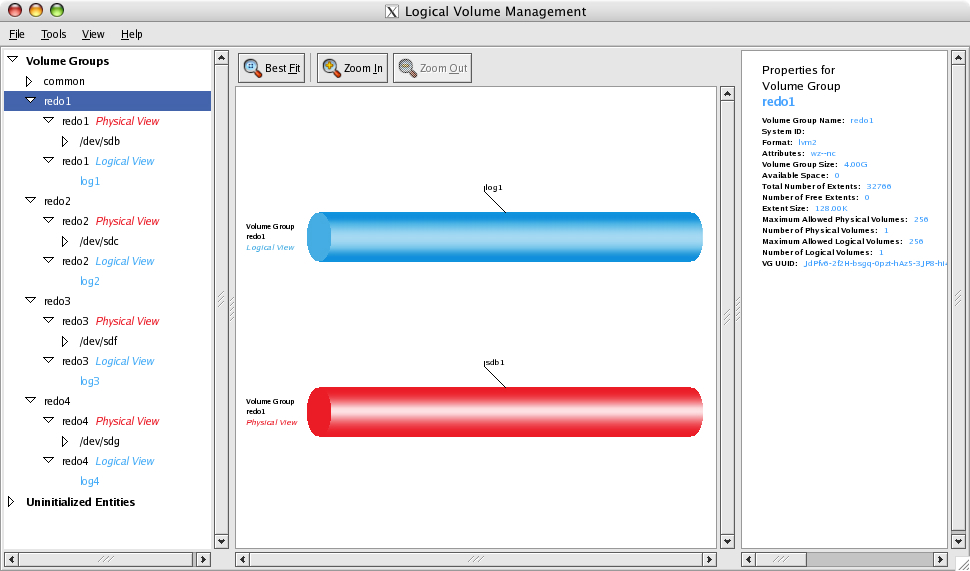
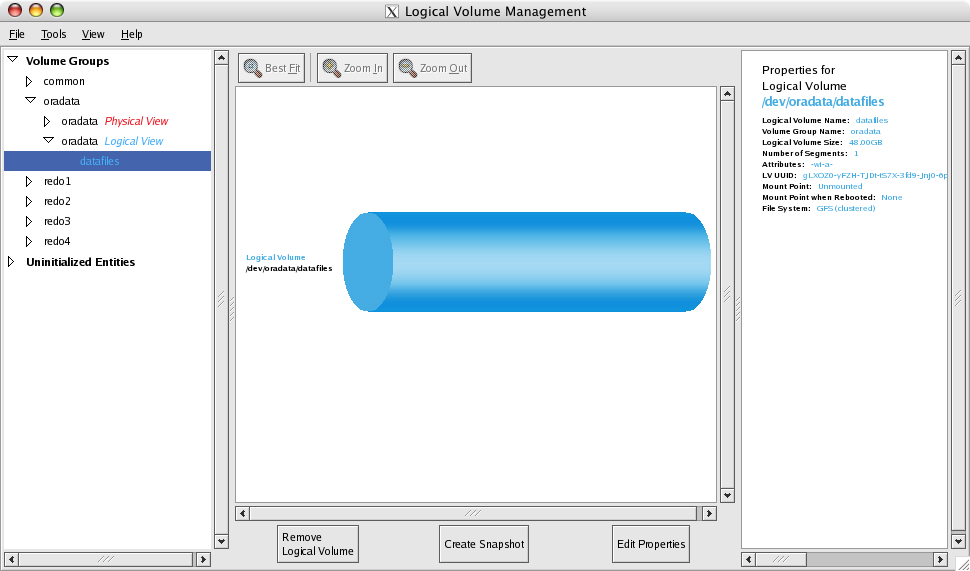
All of the main tablespaces for the entire RAC database will reside on this logical volume. Each node has a dedicated redo/undo volume to minimize any unnecessary sharing of cluster resources during normal operations.
In this view, the completed logical volume layout highlights the CRS, shared home and datafiles logical volumes